This has been a long stage of the build! I did expect it to
be, but I’ll admit it has taken quite some time longer than I estimated and
seeing as this is the first major part of the project that I actually have
experience in, there isn’t really a good excuse for it… but you just sit back
and watch me give them anyway!

Plastering finished we did our wash coat (water and emulsion
50/50 mix) in a brilliantly British magnolia and then started playing with some
colours.

Painting is one of my least favourite things to do. It’s
just so dam boring! I always think: ‘this is will be an easy and relaxing day,
no stress, just painting away’ then half an hour later: I’ve lost my will to
live
So I used the biggest roller I could find

Next came brick work, or more accurately fake brick work: I
know, I know! I could hear Kevin McClouds comments in my ear the entire time I
was doing it – but here’s my justification.
I wanted the brickwork to give some ‘weight’ to the room, so
it wasn’t just a plastered box. We have also only done it in places that ‘are’
actually brickwork behind the plaster. Which I know sounds redundant, but it
needed to be insulated and the old bricks looked awful.

Plus these technically aren’t fake bricks, they are just
really thin! They are made in exactly the same way and from the same material
as standard brick; they are just only 1cm thick. You stick them to the wall
just like tiling and then point between them with mortar – just like real
bricks!
Anyone convinced yet?

Then we laid the slate floor in the kitchen and hallways. I
did it at 45 degrees like this for two reasons. First, I think it looks cool, second
as this is an old building the large main living space isn’t actually that
square, so running the tiles at this angle makes sure you are not drawing
attention to this.

Now comes the wooden flooring for the main living area and
one of the main reasons the timescale of this stage over ran. I, in hindsight,
rather stupidly decided it would be a good idea if I made some fancy 3D effect
parquet flooring.
I also justified it to be a brilliant idea based on the fact that in raw materials, it would actually be very cost effective, deliberately ignoring the time it would actually take me.

We started with 10 sheets of marine grade 12mm birch ply
which was then cut up into narrow strips and divided into three piles. One pile
was given 1 coat of a grey wood stain, 1 pile 2 coats and the last pile 3
coasts.
Everyone keeping up so far?
These strips were then cut into 3 different shapes: two parallelograms
(mirror images of each other) and a diamond. There are over 6 thousand small
little bits of wood in the photo above. Each had to be cut and sanded – it was
an ordeal

Then it was time to lay them, and as you can see, the 3
shapes put together are meant to create a 3D cube effect across the floor.
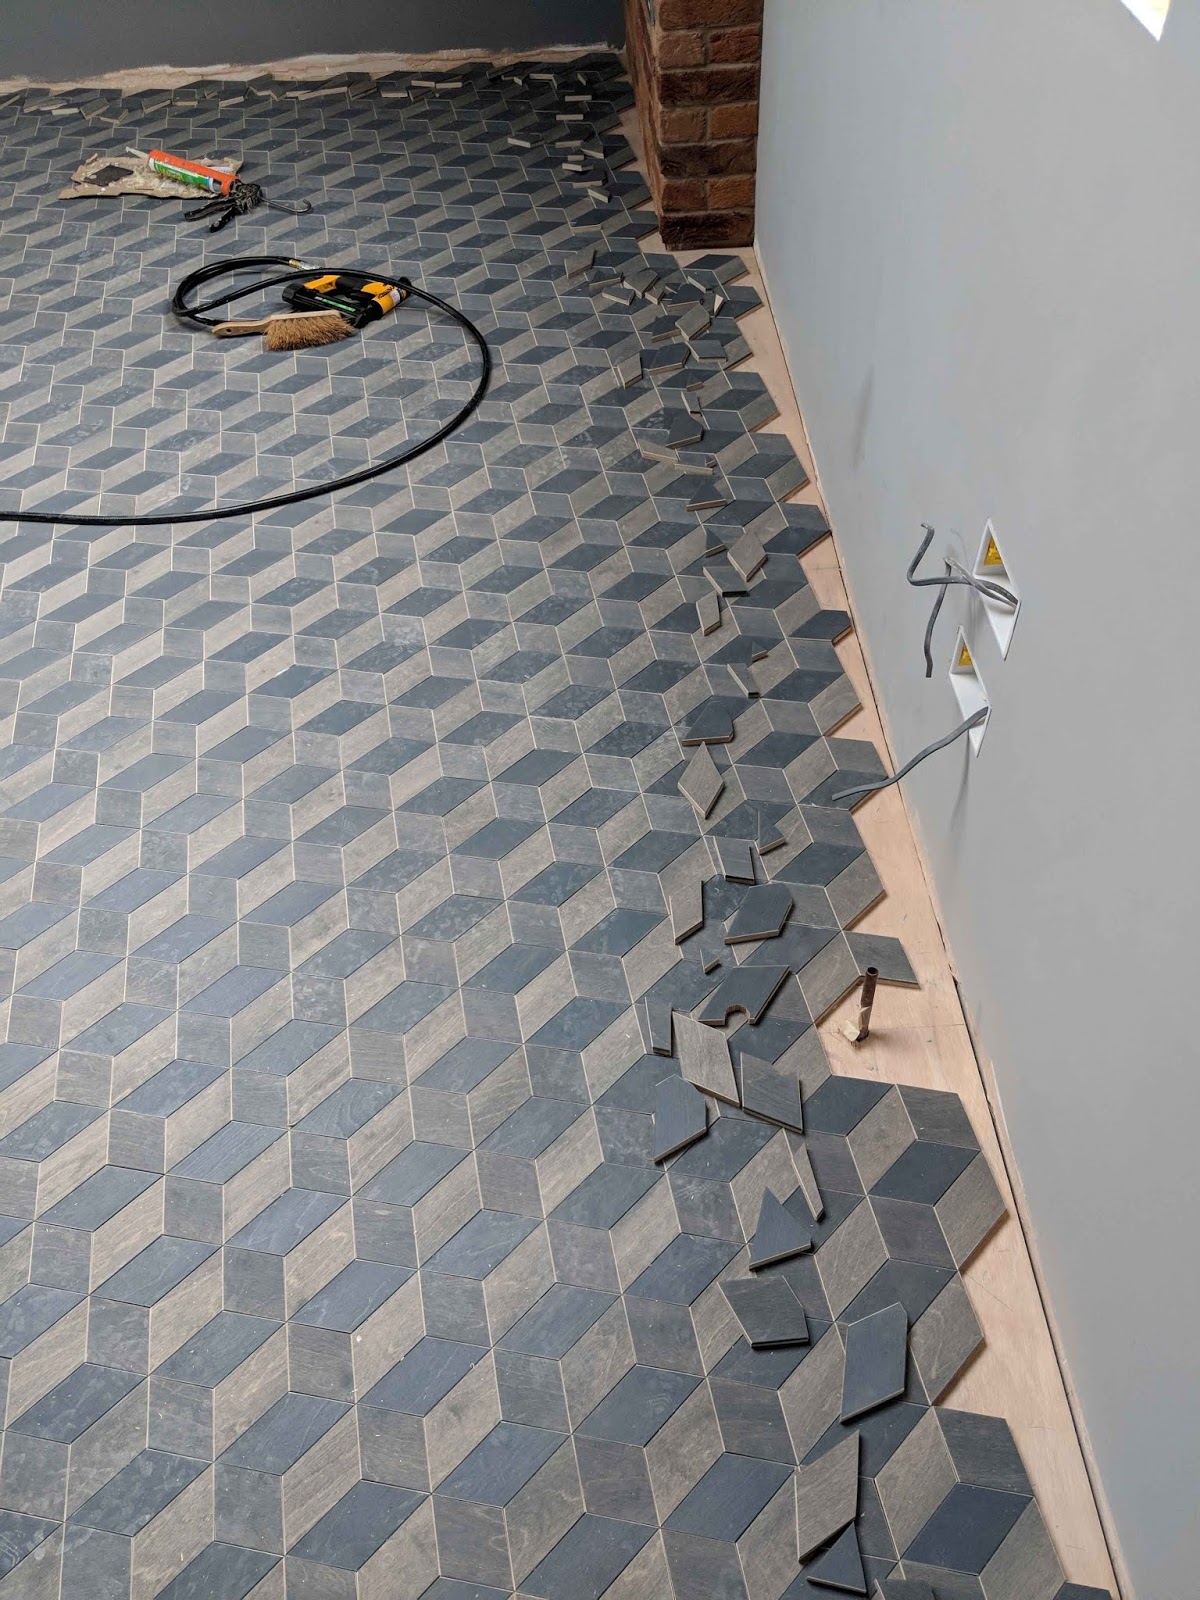
The edge pieces had to be cut in to the line of the wall and
allowances for radiator pipes etc


Finished floor. I am very pleased with how it has turned out
but am in no hurry to ever do it again. Yes it may have been cost effective in
terms of material costs, but it took 2 and half weeks of endlessly repetitive
tasks to do it. So not really cost effective at all!

Having not learnt my lesson at all, next was the doors,
which I also over complicated. (These are my excuses for why this has taken so
long by the way…. My own stupidity)
I decided we should have pocket doors - when the door slides
back into the thickness of the wall, rather than swinging open on hinges. The
good reasoning for doing this is because there are 3 doors right next to each
other in the hall, going off into separate rooms and it could have got messy
and cluttered with all the doors. The real reason I did it however – is because
I thought it would be cool – and I was right
Photo above shows the doors being painted down in the workshop,
you can also see all the oak architrave work in the painting rack ready to be
oiled. Each door in the flat is a different colour (I mean… why not) corresponding
to the accent/feature colour of the room it leads to.

The oak surrounding works around each door (architraves)
were made more complex because these are fire doors. Put simply you have to fit
a strip into the frame of the door that in an event of a fire will swell and
stop smoke entering the room.
Problem is they work by swelling against the thin side edge
of a door, but when you have sliding doors this would just push the door open. Which
would be… you know… less than helpful. So I had to work out a system where we
now have strips facing the inside and outside faces of the door instead,
pushing against each other. It’s all very boring to be honest, but it took some
time to achieve


The 3 pocket doors all closed

Finished door in the bedroom

I have also made some semi-louvered doors for the large hallway
cupboard that will house the washer and dryer (hence the airflow) and the teal
door leads into the bathroom (this is a standard swung door)

Right, some overall shots:
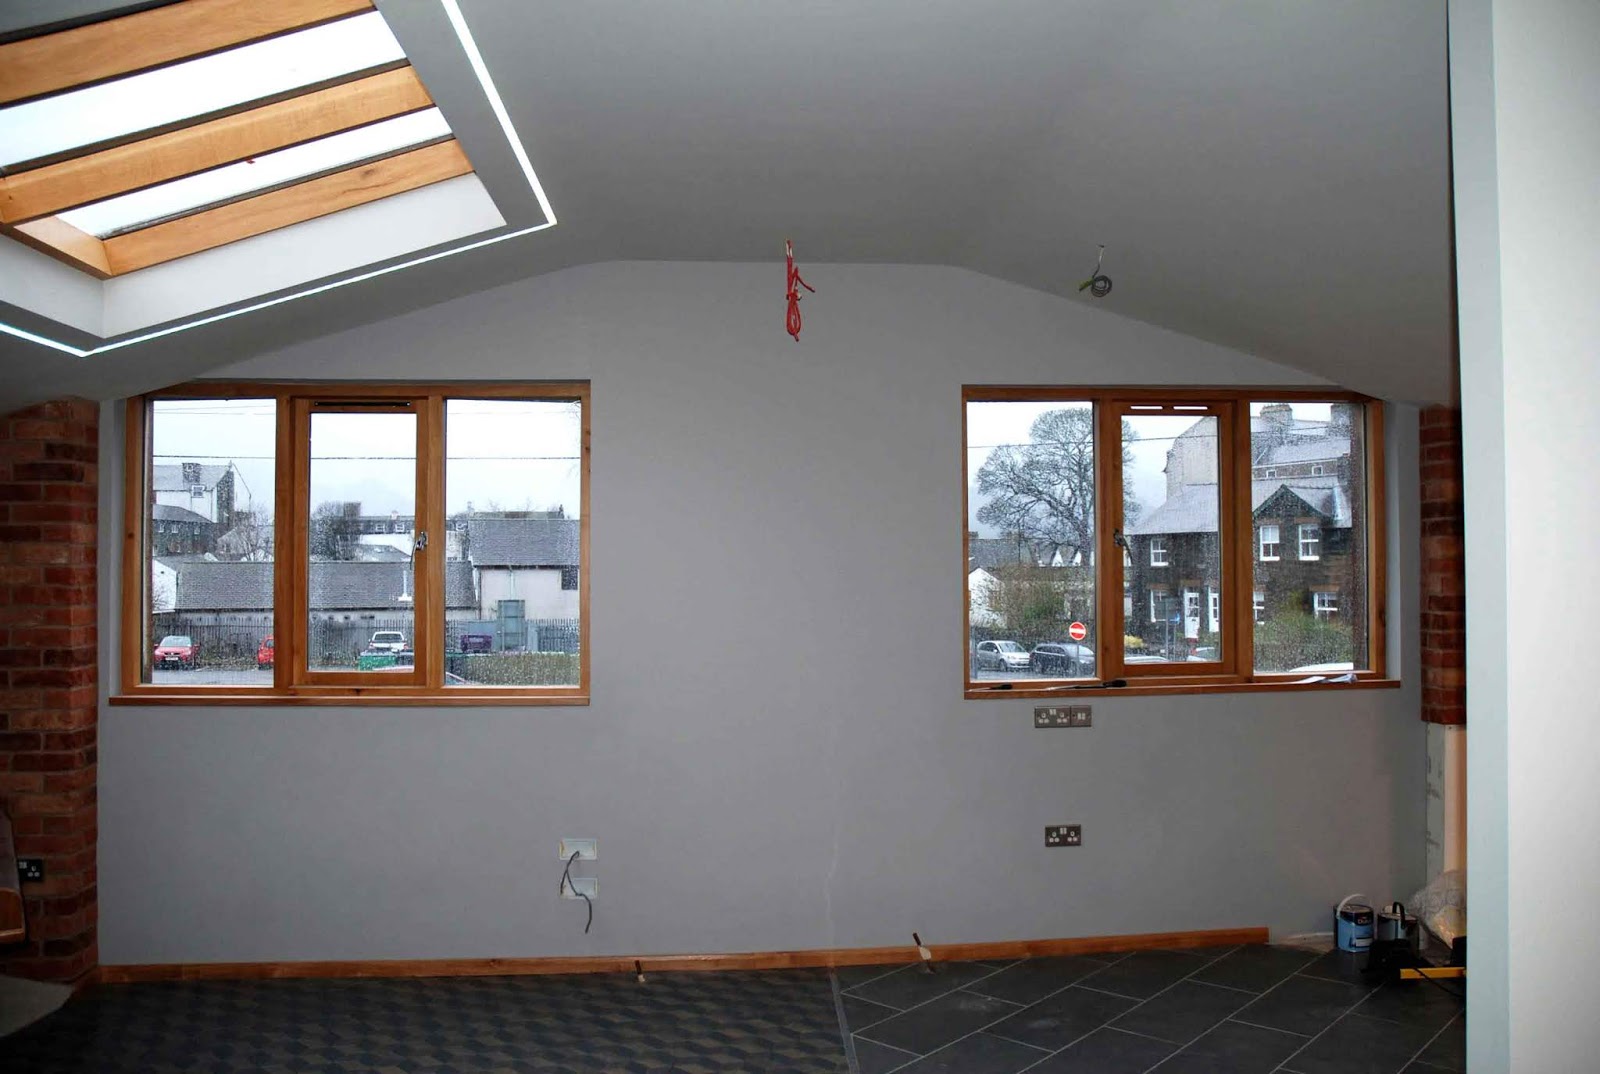
Living room with finished floor and brickwork

Still in main living space looking over to where the kitchen
will eventually be. Brickwork left short of floor as it will be covered by
kitchen units

Looking across the main living space to the door out to the
bedrooms and bathroom
(below) Main bedroom with velux windows and plug points
spaced for bed underneath

(below) 2nd bedroom with mezzanine level over the
stars below. Here you can see how the door colours match the room

The lighting and electrics have also been all but finished
in this area during this stage. I won’t bore you with pictures of switches and
cables. But you may like to see the light around the big skylight in the living
room. At plaster stage I fitted an aluminium track that was skimmed in flush
with the ceiling. This then has LED fitted in it giving a halo effect around the
window. I kind of love it to be honest and cant stop playing! You can change
the colour and everything!

Brilliant work mate. Love the lights and the parquet looks amazing. I did spot a typo (These are my excesses for why this has taken so long by the way - should be excuses
ReplyDelete