Sunday, 22 April 2018

Week 89-91 - Installing Central Heating

Let me start with a question: Who’s been enjoying the unseasonable warm spring weather we’ve been having the last week? Because our heating system was finished just before the mini heat wave - I think it’s obvious you all owe me a thank you for scoring this win from the gods of irony, especially as most of the actual work for installing was done with my long-johns on at only a few degrees. YOU’RE WELCOME!!!


 Anyway, we have our fancy new biomass heating system in and we’re double toasty. Let me quickly clarify, biomass boilers burn wood and other combustible plant based material to make heat, not poo! I only make this point as I have had to clarify this to a few people lately – honestly!

It works basically the same as any other central heating system – boiler heats up water which gets pumped around the radiators and to the hot tap on the sink etc. The only real differences here are the water is heated by burning wood rather than gas and we have a very large ‘buffer tank’ to store the hot water in case there is no fire in when you want heat.


My part of this job was to run all the pipework though the building to radiators and bathroom, kitchens etc. I’ll be honest here, I forgot to take any photos of this really apart from the one above. It basically meant taking the floors up and running the pipes though the joists etc and then putting the floor down again. Pretty straight forward and I had no leaks when it was tested – pretty chuffed! However there were 26 radiators to do, so it took time and quite a lot of pipe.


I also built a concrete plinth for the boiler to sit on


The professionals then turned up to install the boiler, tanks, flue etc. The boiler itself weighs nearly a ton so it took a little use of grey matter to get it off the trailer, into the building and up onto its plinth

My workshop then turned into a sea of copper and fittings for a week while it was all set up and flue commissioned etc.

Finished ‘heating plant’ equipment: Green box on the right is the boiler (or furnace if you prefer). The white tank is the hot water cylinder – actually not that small, 120ltrs, about the size of the tank most people have in their houses. Then the grey tank is the 1500ltr buffer – with its insulation jacket on it kind of looks inflatable right? Trust me its not, weighs a ton! 

All our reclaimed cast iron radiators we are going to use around the building also went off to be sand blasted to get the old paint off the last few weeks, which was a hernia inducing endeavour.


I have also put in 2 hot air blowers for heating in my workshop. This are basically a very fine radiator (a bit like a car radiator) that you pump hot water though. It then has a fan behind that blows air though.


This is a small fire in the furnace, it gets hot! I feel like I could start smelting iron in there…

Sunday, 8 April 2018

Week 86-88 - Internal Walls and Studwork

Its finally time to build the internal walls in the rest of the building and physically see the spaces we will have instead of just in the world of drawings and imagination…
Straight away the building is back to its favourite trick of munching its way through meter after meter of timber like the stuff grows on trees….                 
wait…..
so whys its so damn expensive!

There aren’t actually that many internal walls other than in the residential part of the building, most of the 1k+ meters I’ve used over the past few weeks has been on counter battening and framework to hold plasterboard and box in steels (which I think probably, makes it worse – never mind!)


Up on the top floor (residential) we do at least have walls to get excited about. I am very relieved and pleased that the dividing up of the space into separate rooms has worked out very well. The space seems to of subconsciously grown rather than shrink as ive divided it up. 


The spaces seem well proportioned and everything should fit where I imagined it would (who knew scale drawings worked so well!) 


Rather hard to tell from just the stud-work but up here we now have hallway (main entrance), two bedrooms and an open plan living/kitchen area


We have gone for pocket doors into the bedrooms and living space – this is where the door slides into the thickness of the wall (pocket within the wall) rather than on hinges into the room. This requires the making of the pocket and fitting of the sliding track while making the walls, so I have done this at this stage


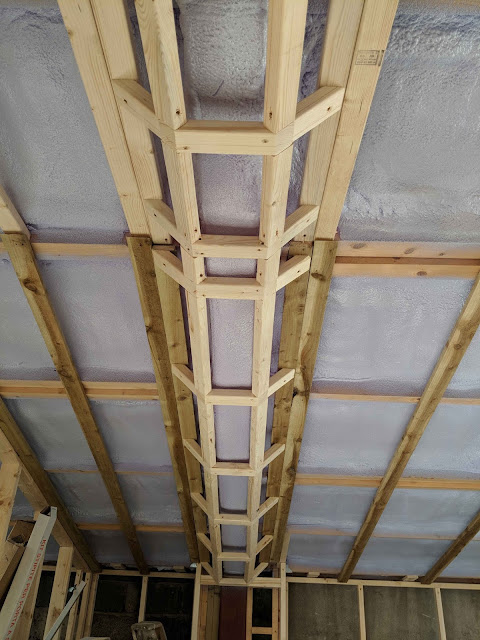
I decided it would be nice to box the ‘a-frame’ steel in at some nice angles to give it some interest up here. Lets all pretend this looks at least 4 times better than just square would have done – as it took 4 times as long to do!


The two side walls of the gallery are original (approx. 200 year old) stone walls. They have always had a thick lime render on them and are as far from straight and level as a politician from integrity, plus they need insulating, so most of it will be re-boarded. However we thought it would be nice to have at least some of it on show to go with the centre spine wall of the building.


To be honest this turned into a nightmare quickly – as soon as I stripped the render it was obvious this was a wall that was never intended to be an aesthetically pleasing/feature wall. But I had started now, and I couldn’t let the rest of the walls see this one be me! They might gang up and unionise and then where would I be!?
3 days of cleaning, rebuilding and repointing later I’m quite pleased with the results